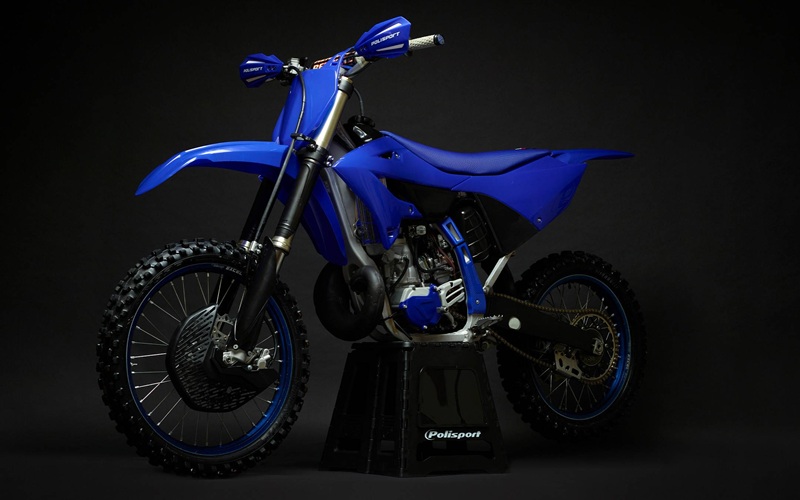
If there's a collection of brands that make a wide range of different products, Yamaha sure is the godfather. The Japanese brand makes everything from all kinds of musical instruments and audio equipment to electronic devices, vehicle interior products and motorcycles among other products.
Throughout their pallet of goods, Yamaha does one thing best and that is making a reliable piece of tech, especially when it comes to their motorcycles. They are also made with the latest technological advancements in mind to make them safer and more powerful at the same time. This makes them hold their value well and give you an unforgettable experience every time you go for a ride.
Types of Plastics Kits

Individual
An individual plastics kit is not an actual kit per se but it does serve as a more versatile solution than the other two options. This kit is essentially a single piece of plastic which is useful if you don't need to replace multiple parts so you don't have to get Yamaha plastics kits that offer more than you actually need.
Standard
If you need to get more than just a single part replaced, then you are better off with a standard kit. This type of plastics kit usually comes with a side panel, radiator shroud, front fender and an air box cover as replacements. This is the most common Yamaha plastics kit as it's the most cost-effective since you get to replace plenty of components without paying for a full kit.
Full
When you need to replace every single plastic component on your Yamaha, you should consider a full plastics kit. This kit contains everything the standard kit contains as well as the lower fork covers and rear fender. You get two more pieces but the price goes up significantly just because now you have everything. The fact that full kits are pricier is because you can install everything from a standard kit now and install other bits later on.
What Matters in a Plastics Kit
Thickness
When it comes to durability and toughness the thickness of the plastic pieces is quite an important factor. The thicker they are the stronger they are and the better they protect the motorbike from flying debris. Thicker materials may add weight but they also help keep the frame safe during accidents. But keep in mind that thicker plastic can break more easily as it's not as flexible.
Compatibility
No matter how thick the Yamaha dirt bike plastics you get, if they don't match the make and model Yamaha you have they won't be of any use to you. They need to match the exact shape and size of plastics you already have on your Yamaha so that they can be installed let alone protect your dirt bike properly.
Decals
Plastic pieces on their own are good for only one thing and that is protection but you can make them much more than that with stickers. Choosing a pack of decals with your Yamaha dirt bike plastics kit allows you to customise the look of your dirt bike however you want as there are thousands of different designs you can choose from.
Types of Materials in Plastics Kits
ABS
One of the most popular plastics is ABS or acrylonitrile butadiene styrene which is impact-resistant and quite strong. With a plastics kit made of ABS, you can take on the harshest of environments in terms of flying debris and sharp objects without a worry in the world. Keep in mind though that ABS is not that flexible.
Polypropylene
PP or polypropylene plastic is the exact opposite of ABS plastic since it's not that impact-resistant. However, polypropylene plastic is resistant to chemicals as well as mud and oil. This is why mudguards are often made of polypropylene and some dirt bikes have their tanks made of PP.
Polycarbonate
If you want a Yamaha dirt bike plastics kit that has almost the same level of impact resistance as that of ABS it's clear that you should go for polycarbonate plastic pieces. The latter is also the reason why dirt bike visors and windscreens come made of polycarbonate.
Nylon
Also known as polyamide, nylon plastic is quite tough and wear-resistant which is why it's quite a common material in plastics kits. Nylon is also used for the making of foot pegs and gear levers as they need to take a lot of abuse and Nylon is the perfect material for that.
How to Install a Plastics Kit
Prepare
The first you need to take when installing a plastics kit on your Yamaha is to prepare your work area. This involves cleaning your dirt bike so that when the new plastic pieces are put on, the bike looks like it's brand new. Also getting rid of oils and dirt will help the pieces and stickers adhere better.
Remove
Next comes the removal of the current Yamaha dirt bike plastics which means you need to pry them off with a trim removal kit and/or remove bolts, depending on how they're mounted on the bike. However, there are usually fasteners and clips holding them together in place.
Install
Installing the new trim pieces involves doing the same thing you did when removing the old ones, only reversed. Once done give them a good wipe down, align the stickers and apply them. Go over them with a squeegee to remove air bubbles and you're done.